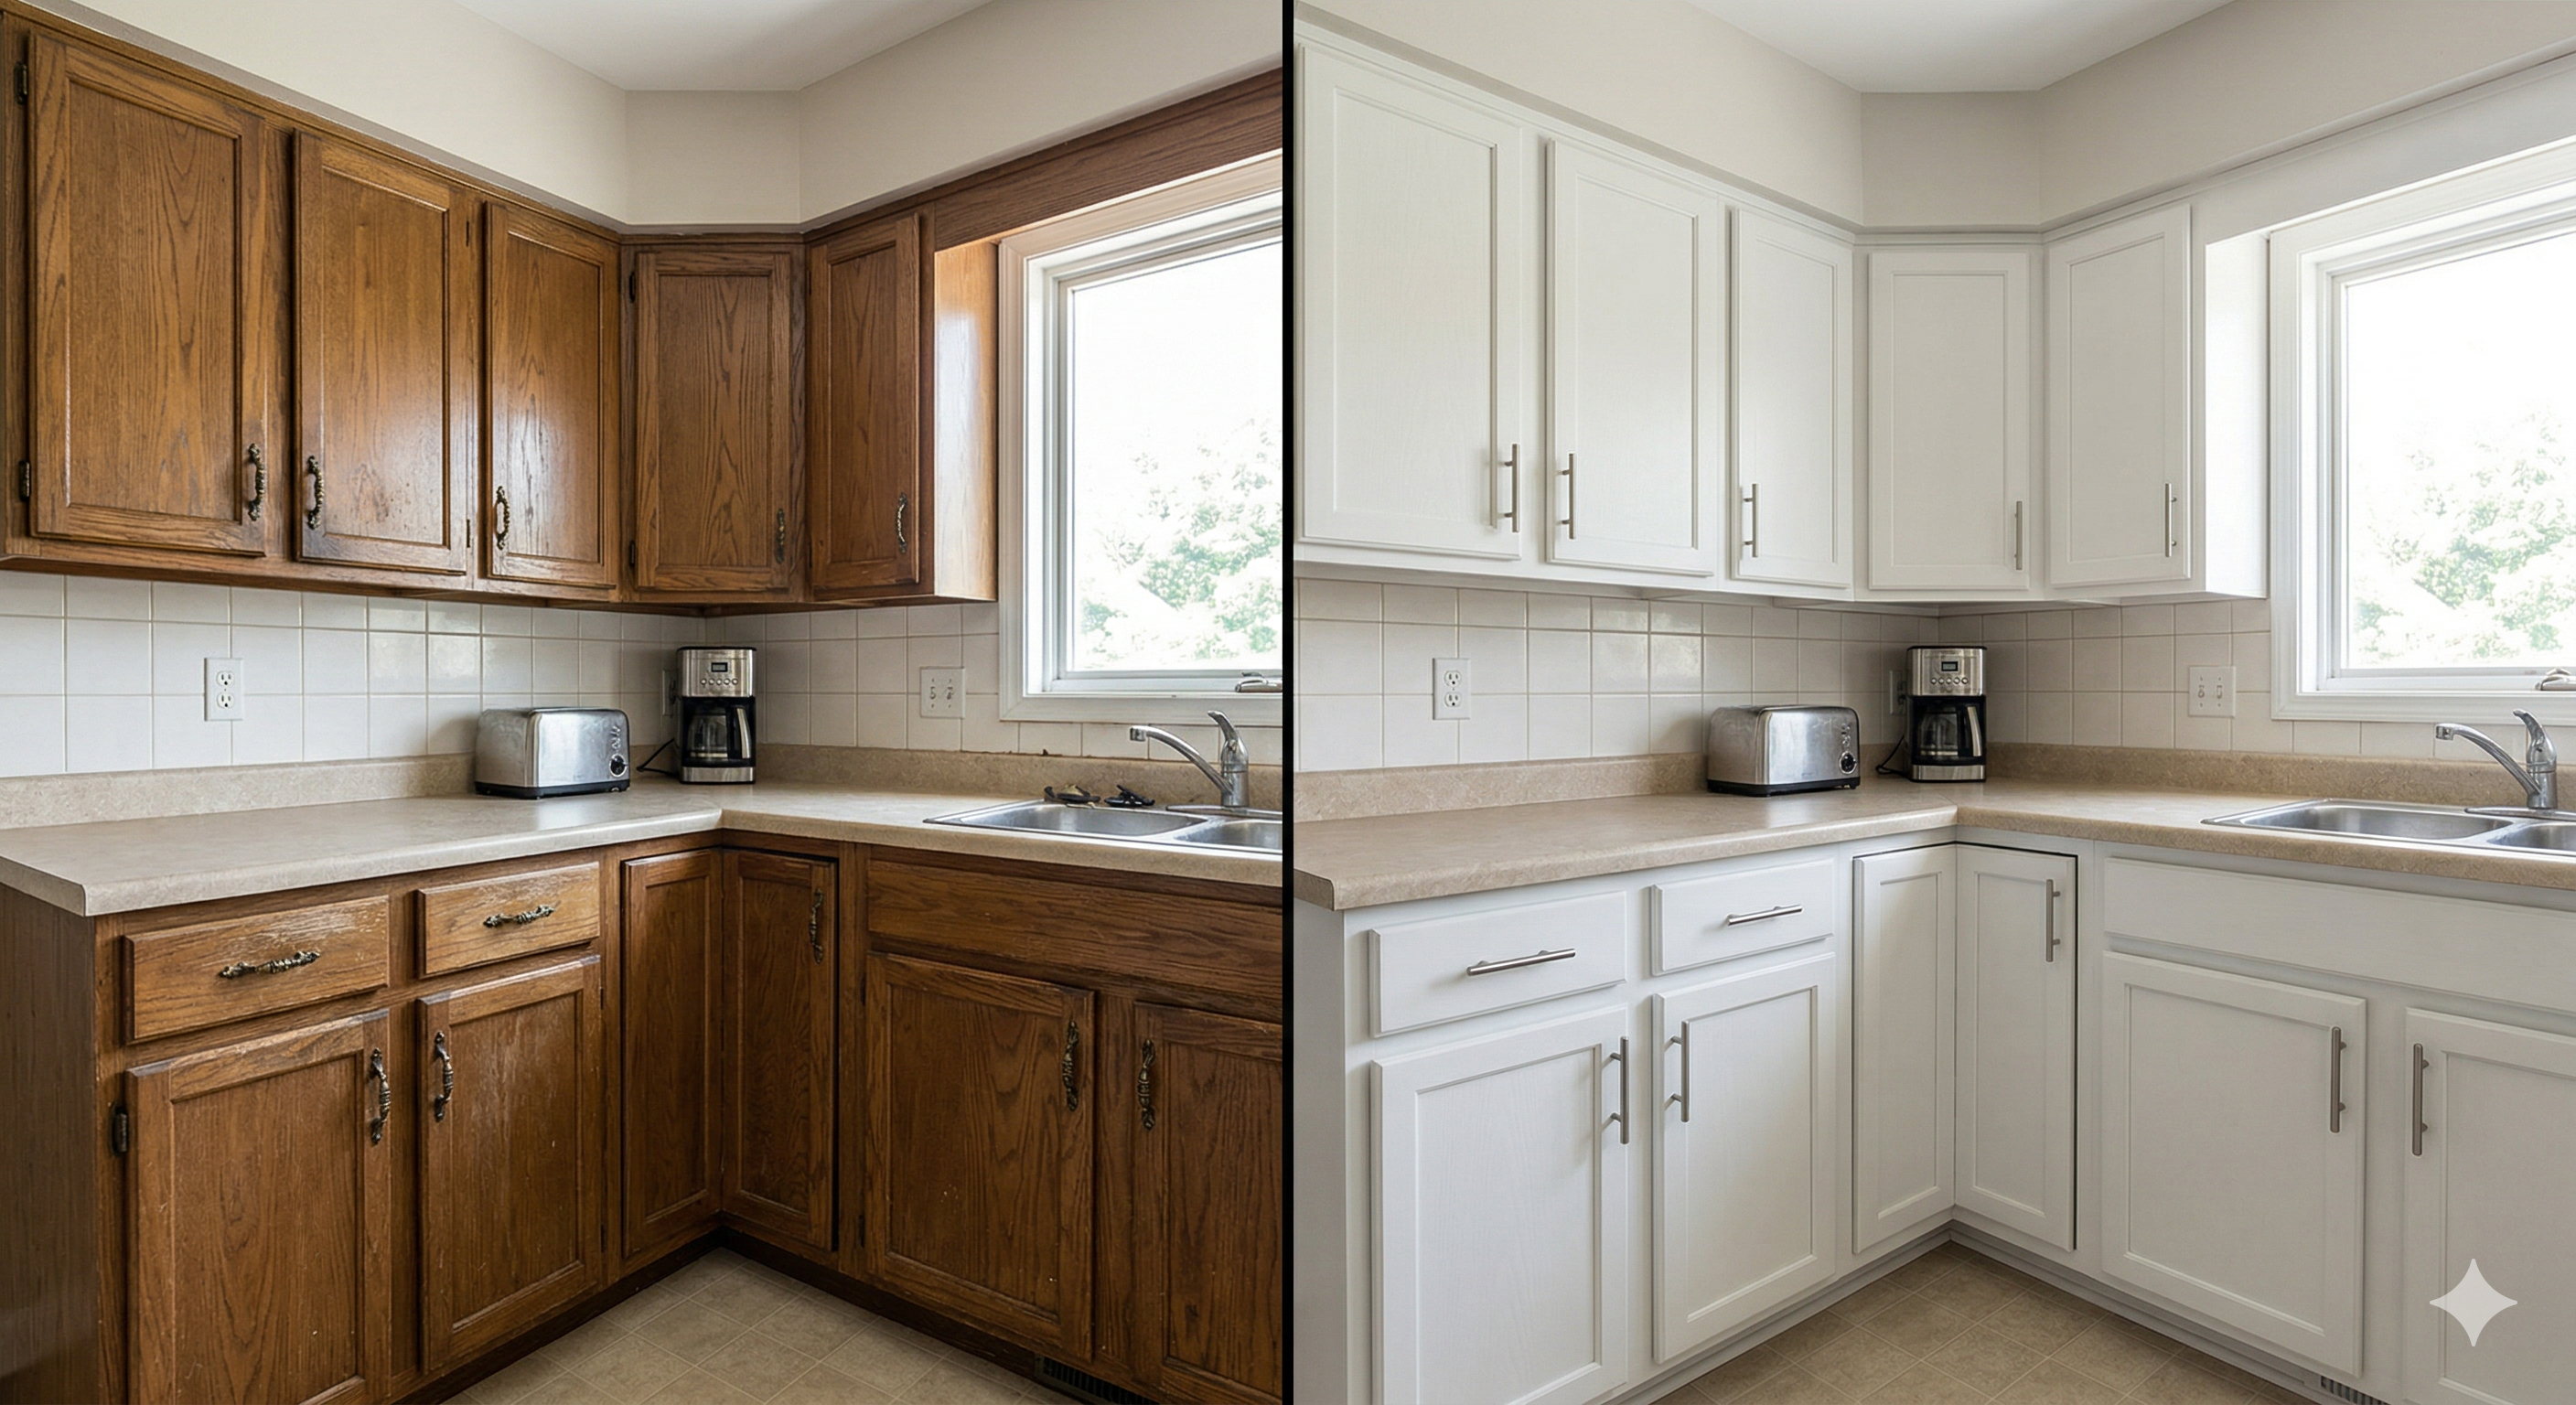
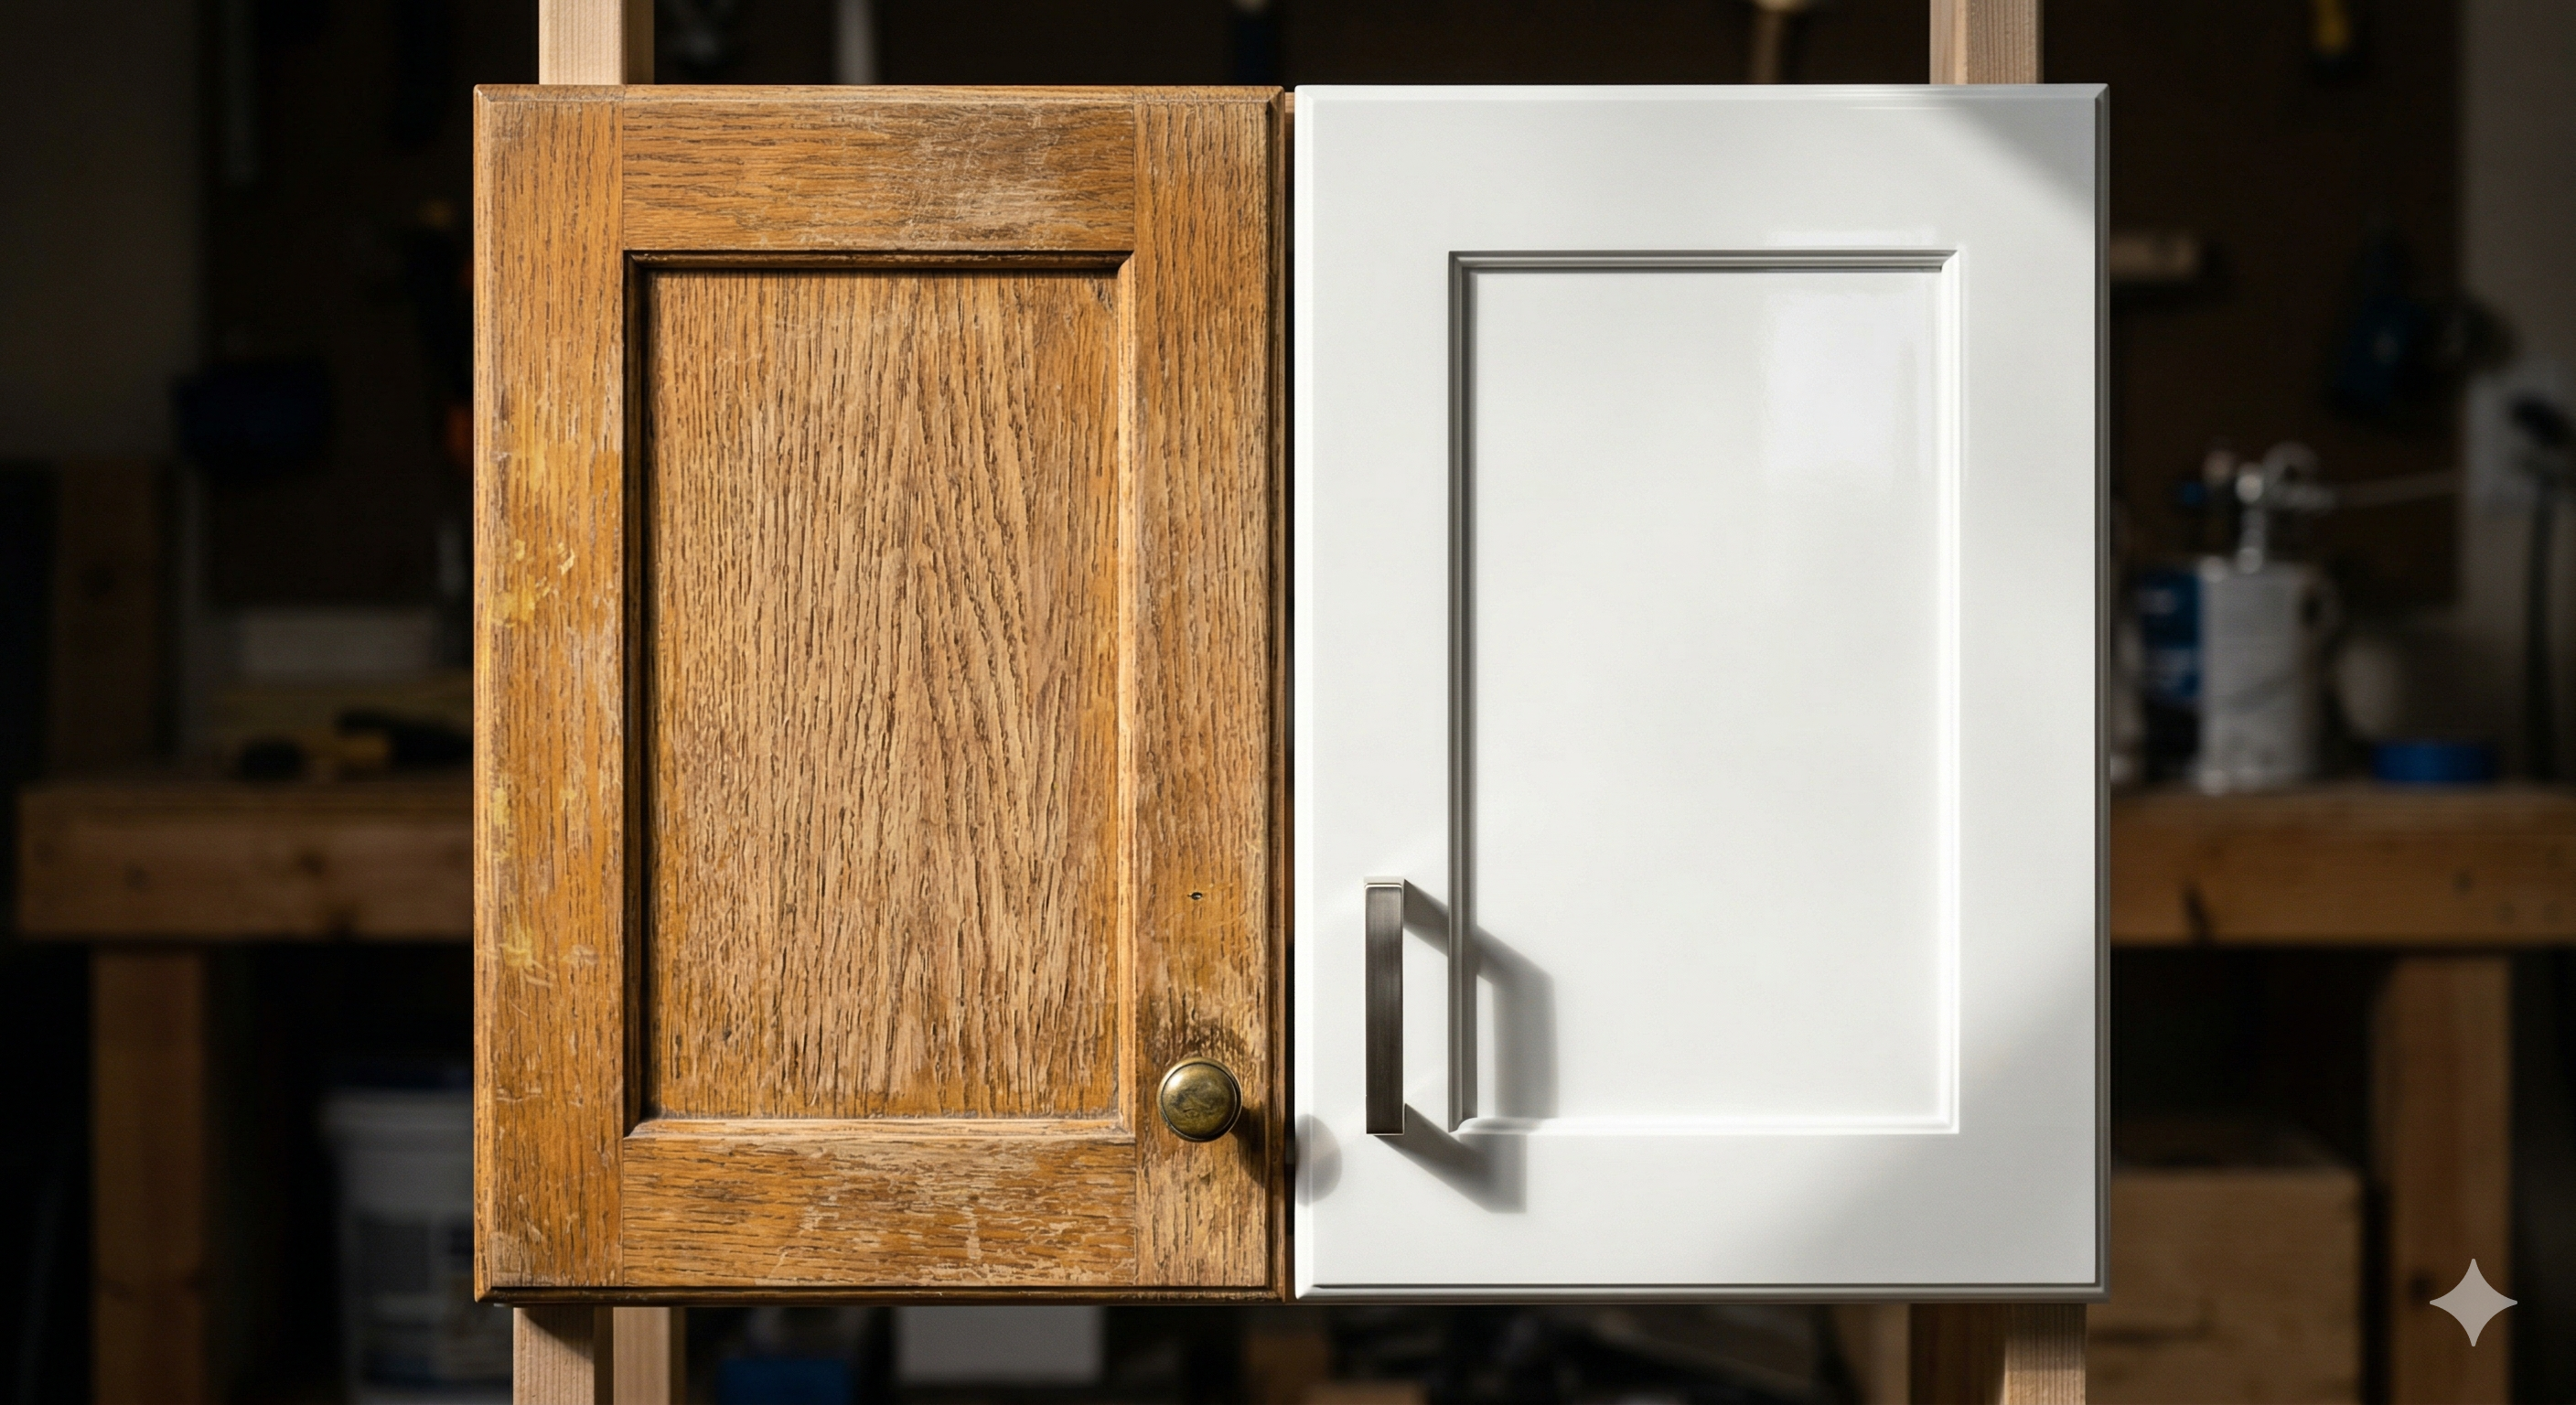
How we deliver a cabinet finish that lasts.
Cabinet refinishing isn't just painting — it's a multi-phase process involving precision labeling, professional shop finishing, and meticulous reinstallation. Below is exactly what we do, step by step.
-
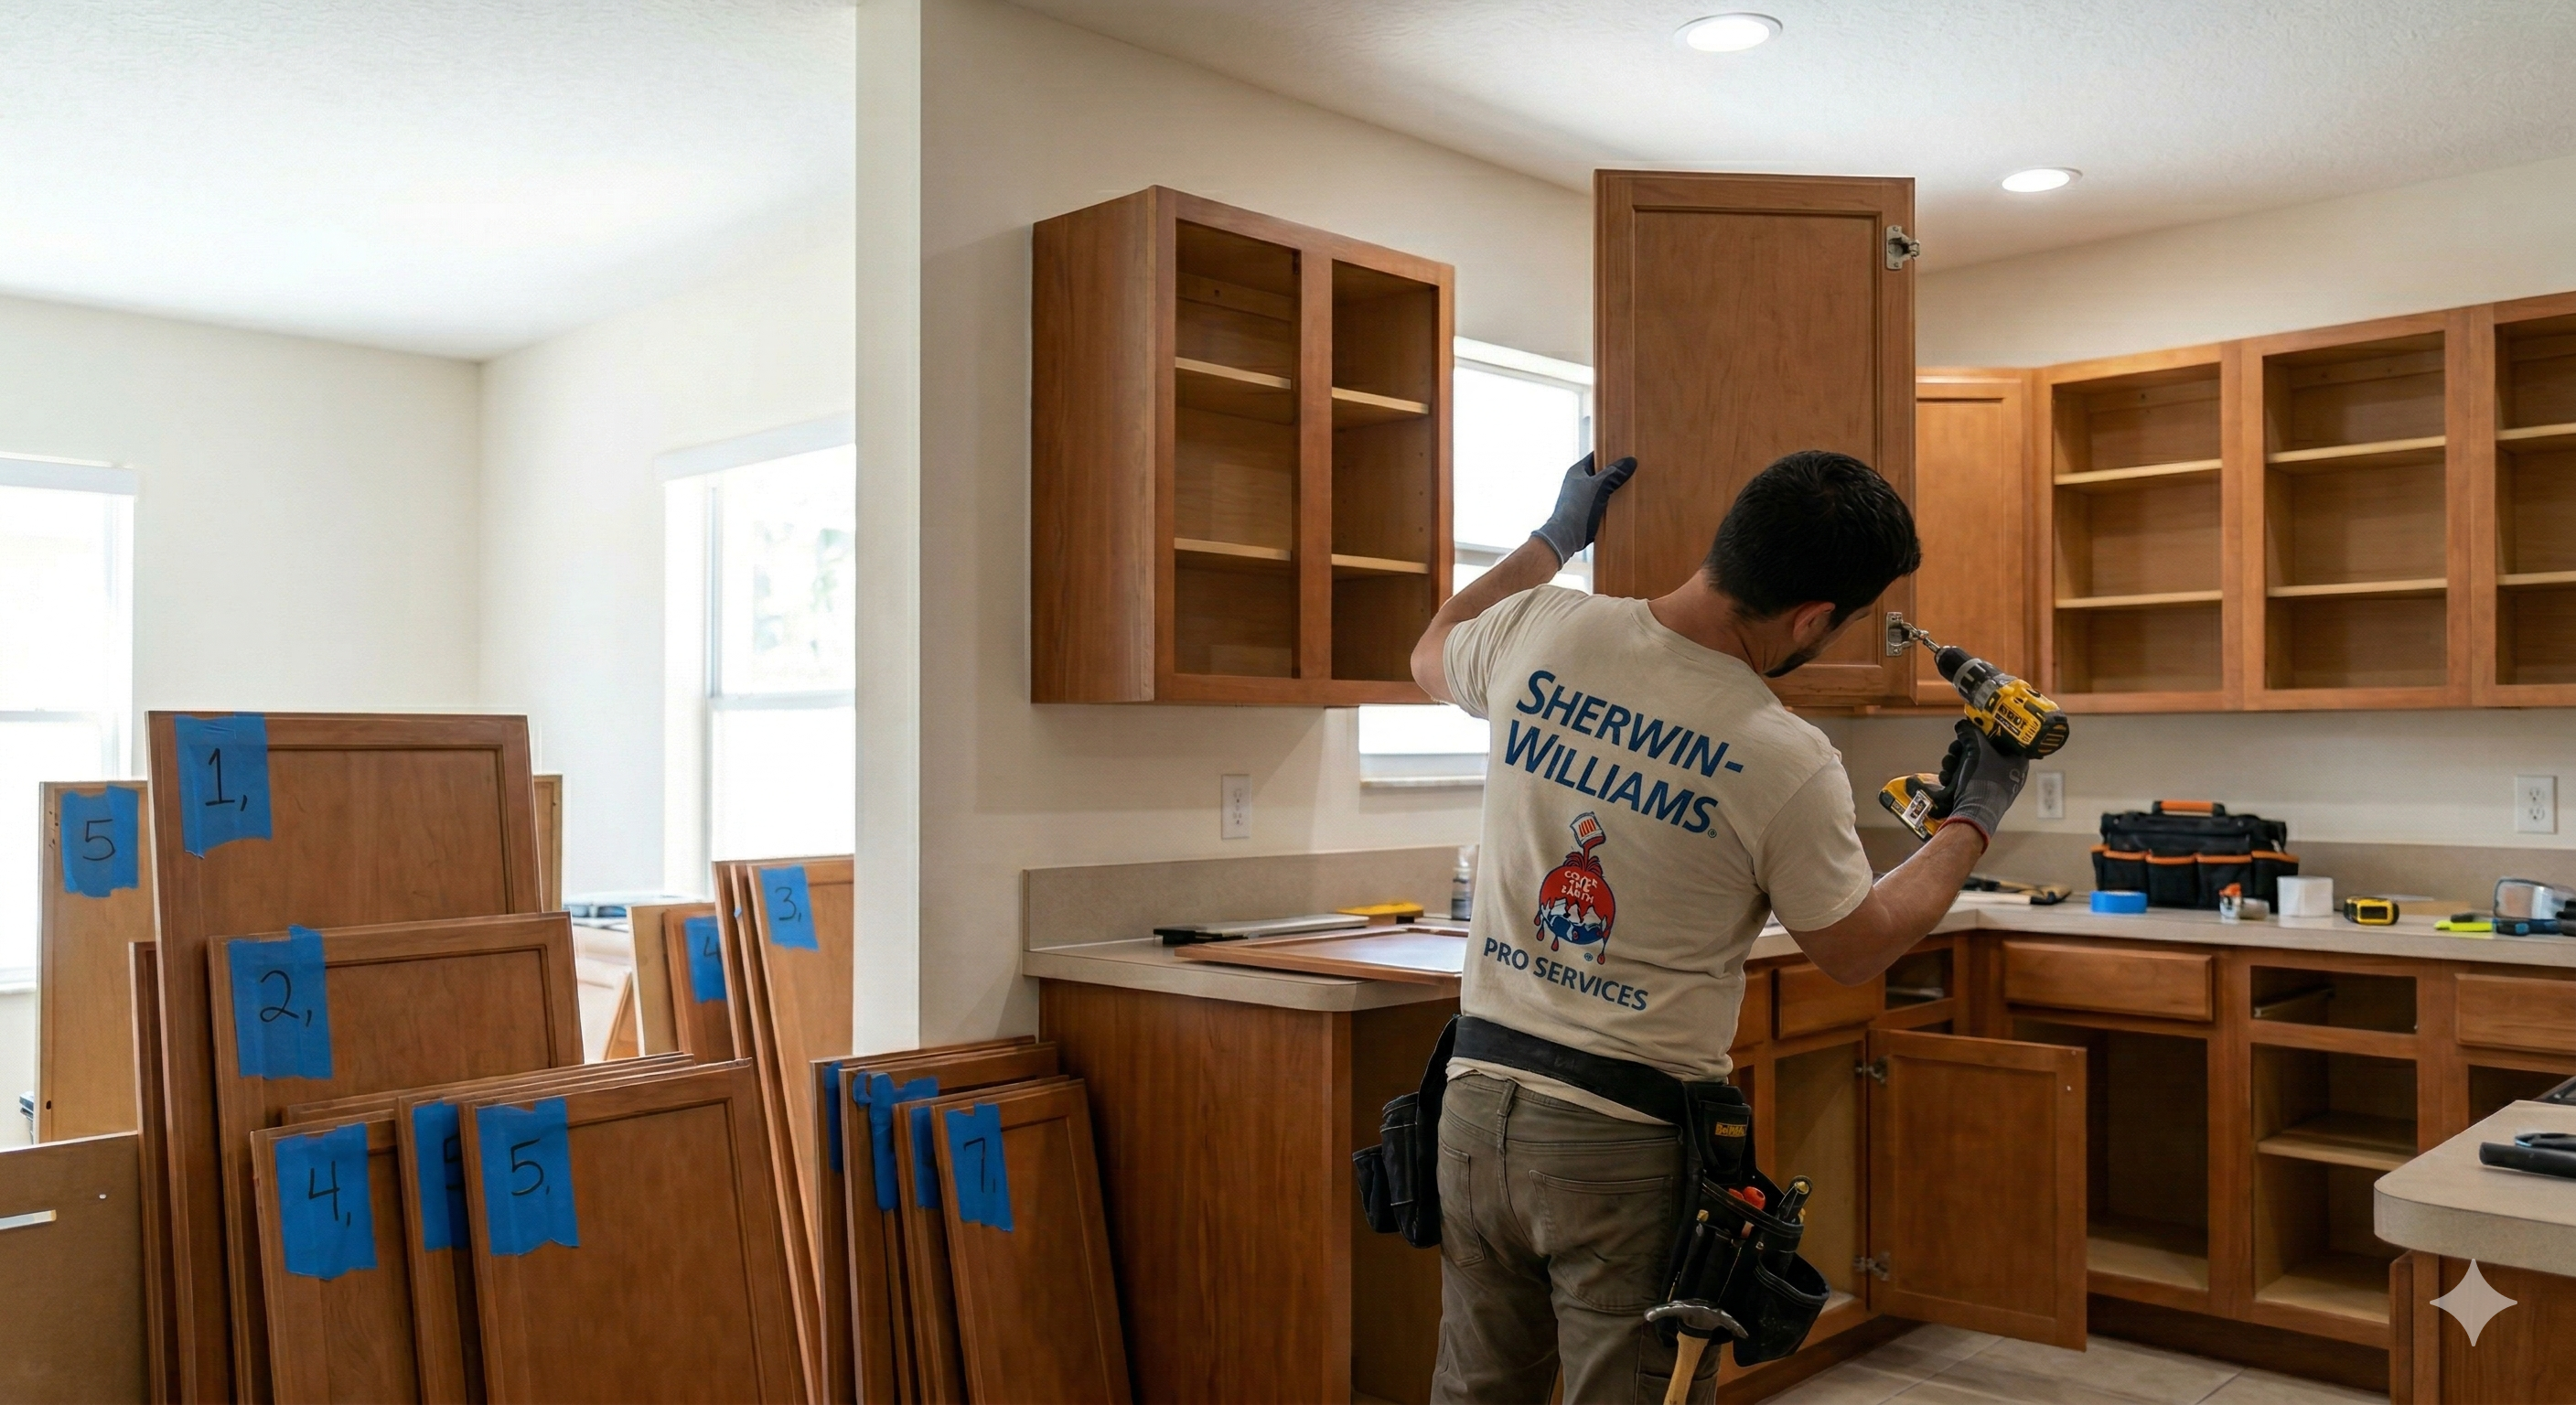
1
Precision Removal & Labeling
Every door, drawer front, and hardware piece is carefully removed and labeled using our proprietary labeling system. Each component is catalogued by cabinet position so reinstallation is fast, accurate, and eliminates any guesswork. Nothing gets mixed up, nothing gets scratched.
-
2
Transport to Spray Shop
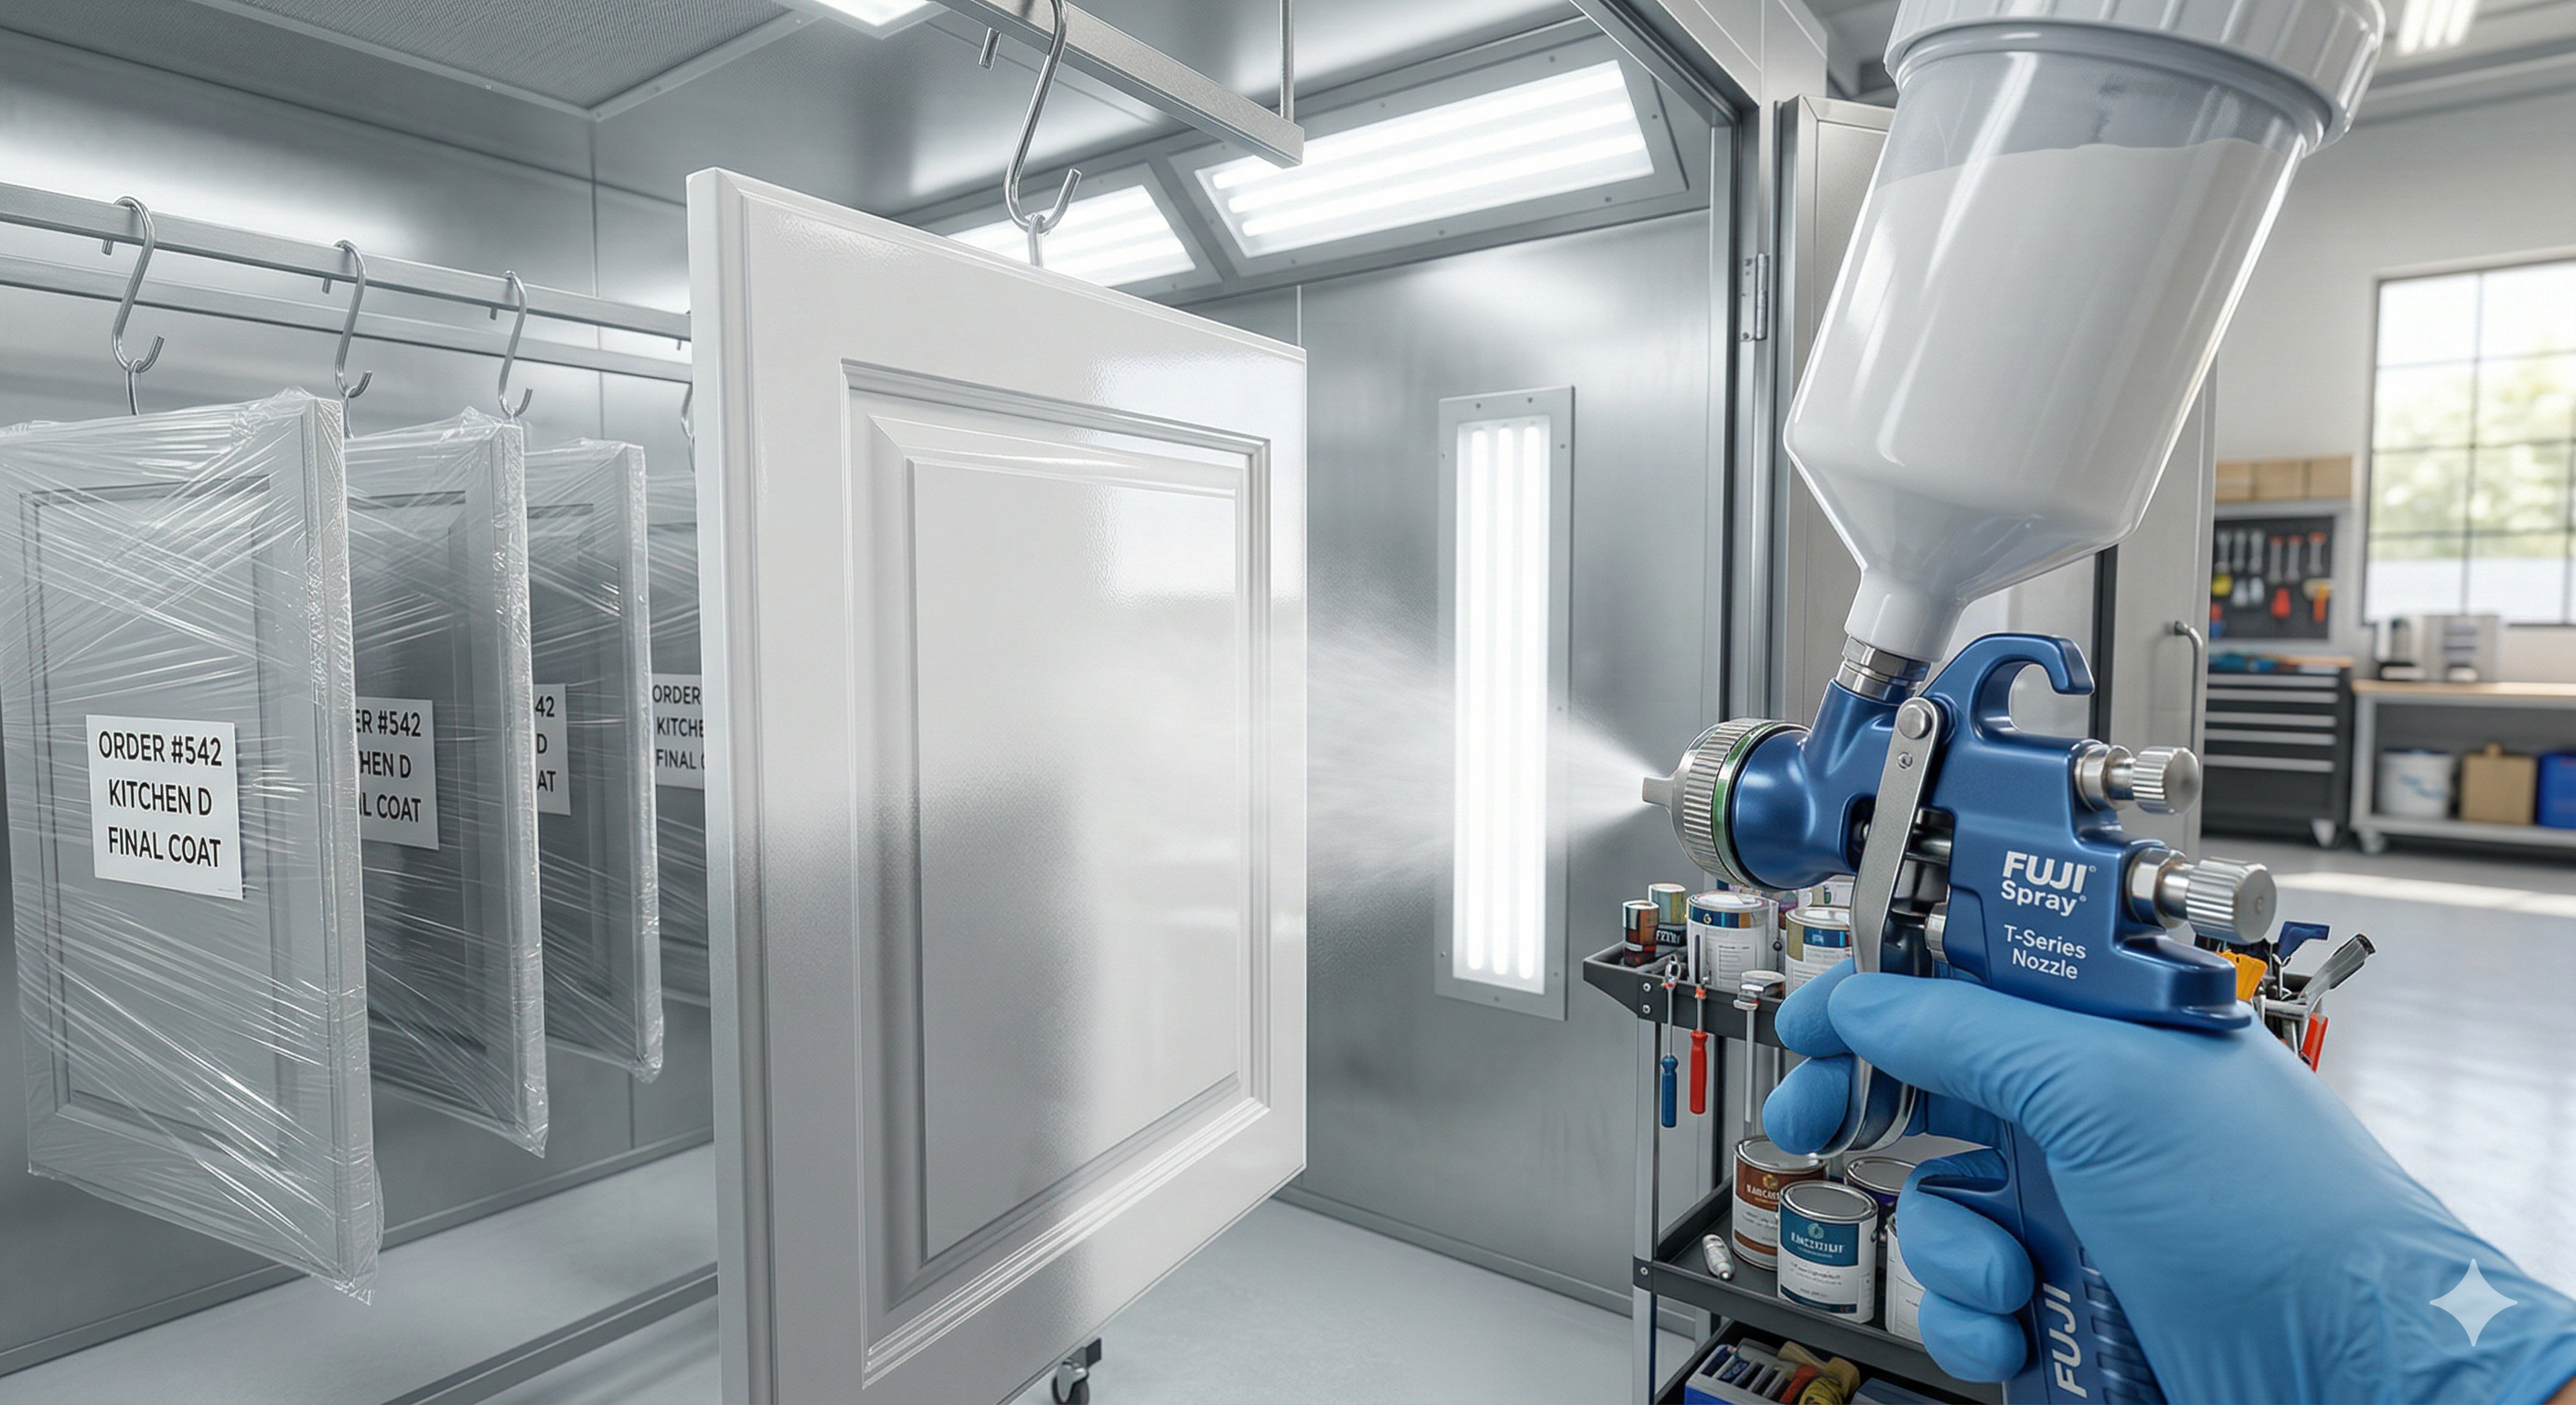
All doors and drawer fronts are carefully transported to our professional spray finishing shop. Shop-controlled finishing produces a smoother, more uniform result than in-home application — it's how production cabinets are made, and it's how we deliver that level of quality to you.
-
3
Complete Home Protection
Before any shop work begins, we fully protect your kitchen. All flooring, backsplashes, countertops, ceilings, and surrounding surfaces are covered with professional-grade plastic sheeting and drop cloths to prevent overspray and surface contamination. For cabinet boxes that cannot be removed, we use cut-and-roll techniques with precise masking for a clean, defined finish edge.
-
4
Professional Cleaning & Degreasing
All cabinet box surfaces, doors, and drawer fronts are thoroughly cleaned and chemically degreased before any sanding or coating begins. Years of cooking oils, cleaning products, and everyday grime are removed completely — because paint applied over contamination will peel, no matter how good the topcoat is.
-
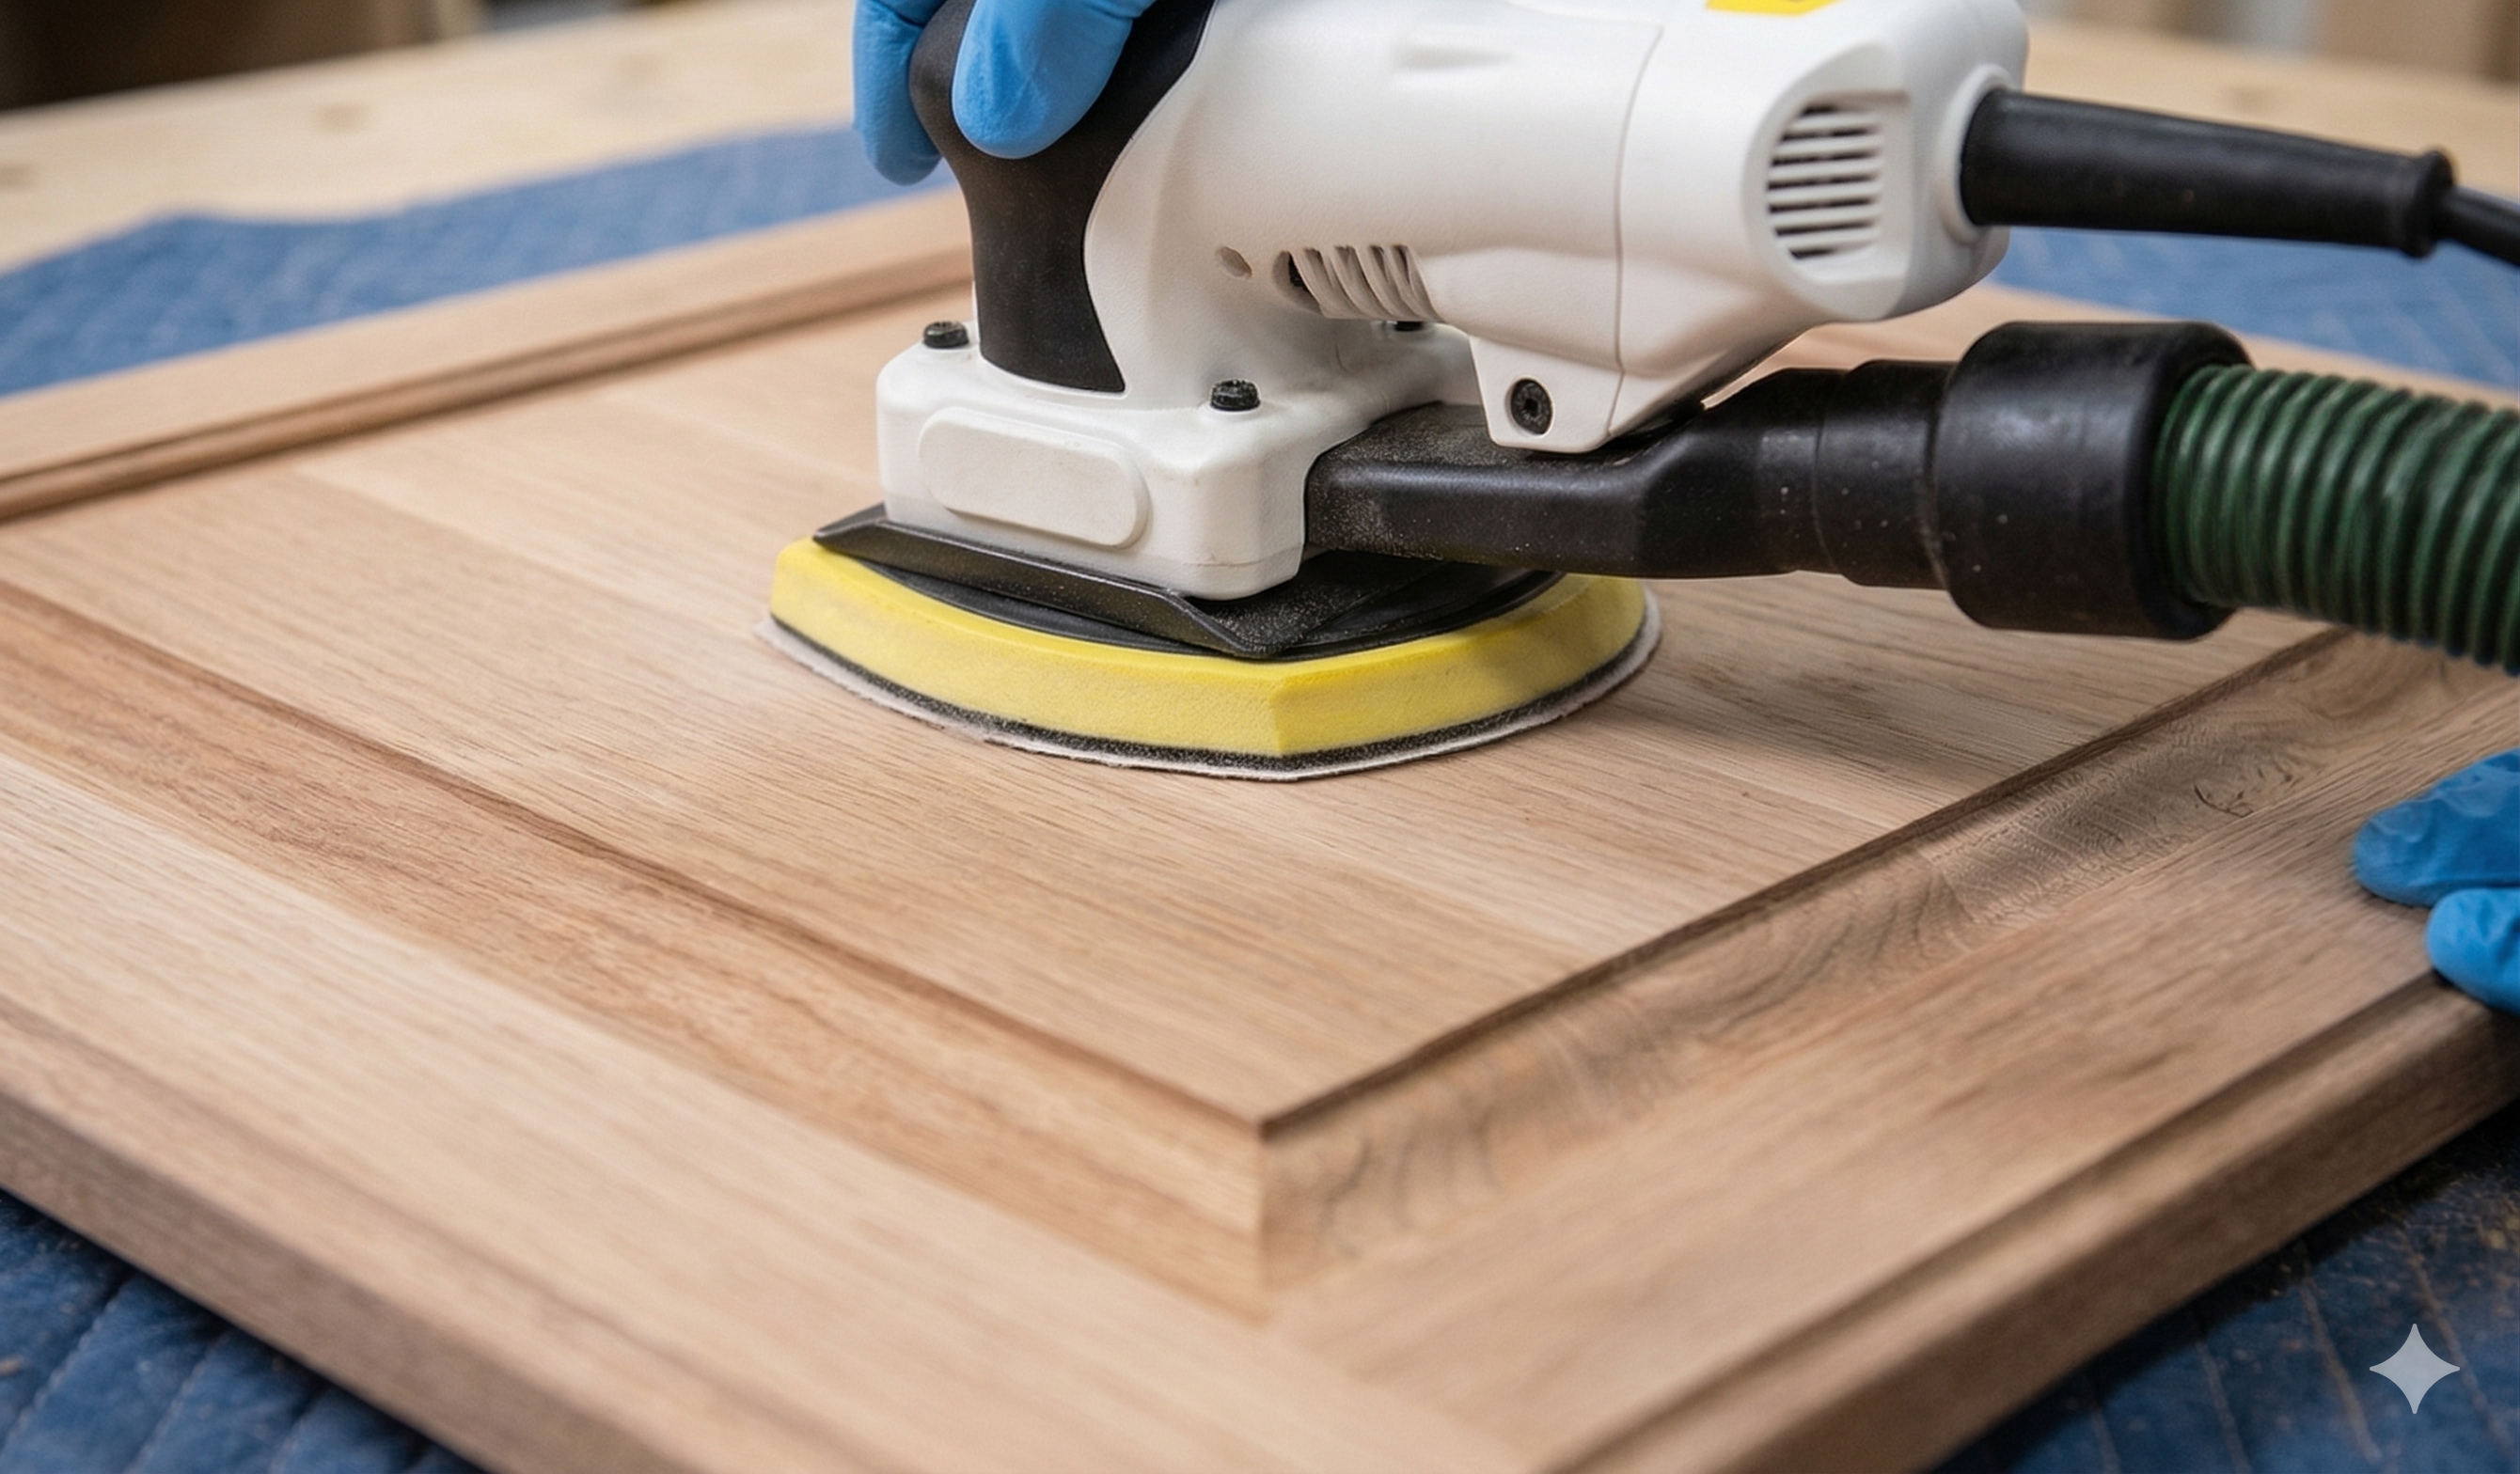
5
Dustless Mechanical Sanding — 180/220 Grit
Using professional EKASANDER dustless orbital sanders, all surfaces are sanded at 180 to 220 grit to create the mechanical bond profile that allows primer to properly adhere. Dustless sanding keeps your home clean and eliminates the airborne particles that contaminate finishing coats.
-
6
Dust Removal & Surface Inspection
After each sanding stage, all surfaces are thoroughly vacuumed and tack-wiped to remove 100% of residual dust and debris. The surface is then visually inspected before any coating is applied — one missed defect at this stage becomes permanent once under topcoat.
-
7
2-Coat Bonding Primer Application
We apply two full coats of Renner Wood Coatings 1K 643/648 Bonding Primer — a professional-grade primer specifically engineered for cabinetry and wood surfaces. Each coat is applied at 2 mils wet film thickness and sanded between coats. On surfaces with heavy tannin bleed or staining, a coat of Cover Stain oil-based stain blocker is applied prior to the primer system to ensure total color uniformity — no bleed-through, no surprises.
-
8
Inter-Coat Sanding — 320/220 Grit
After the primer system cures, all primed surfaces are sanded again at 320 to 220 grit using the dustless EKASANDER system. This step removes the primer orange peel, seals any remaining grain raise, and creates the ultra-smooth profile required for a glass-like topcoat. Surfaces are vacuumed and tack-wiped again before the finish coat system begins.
-
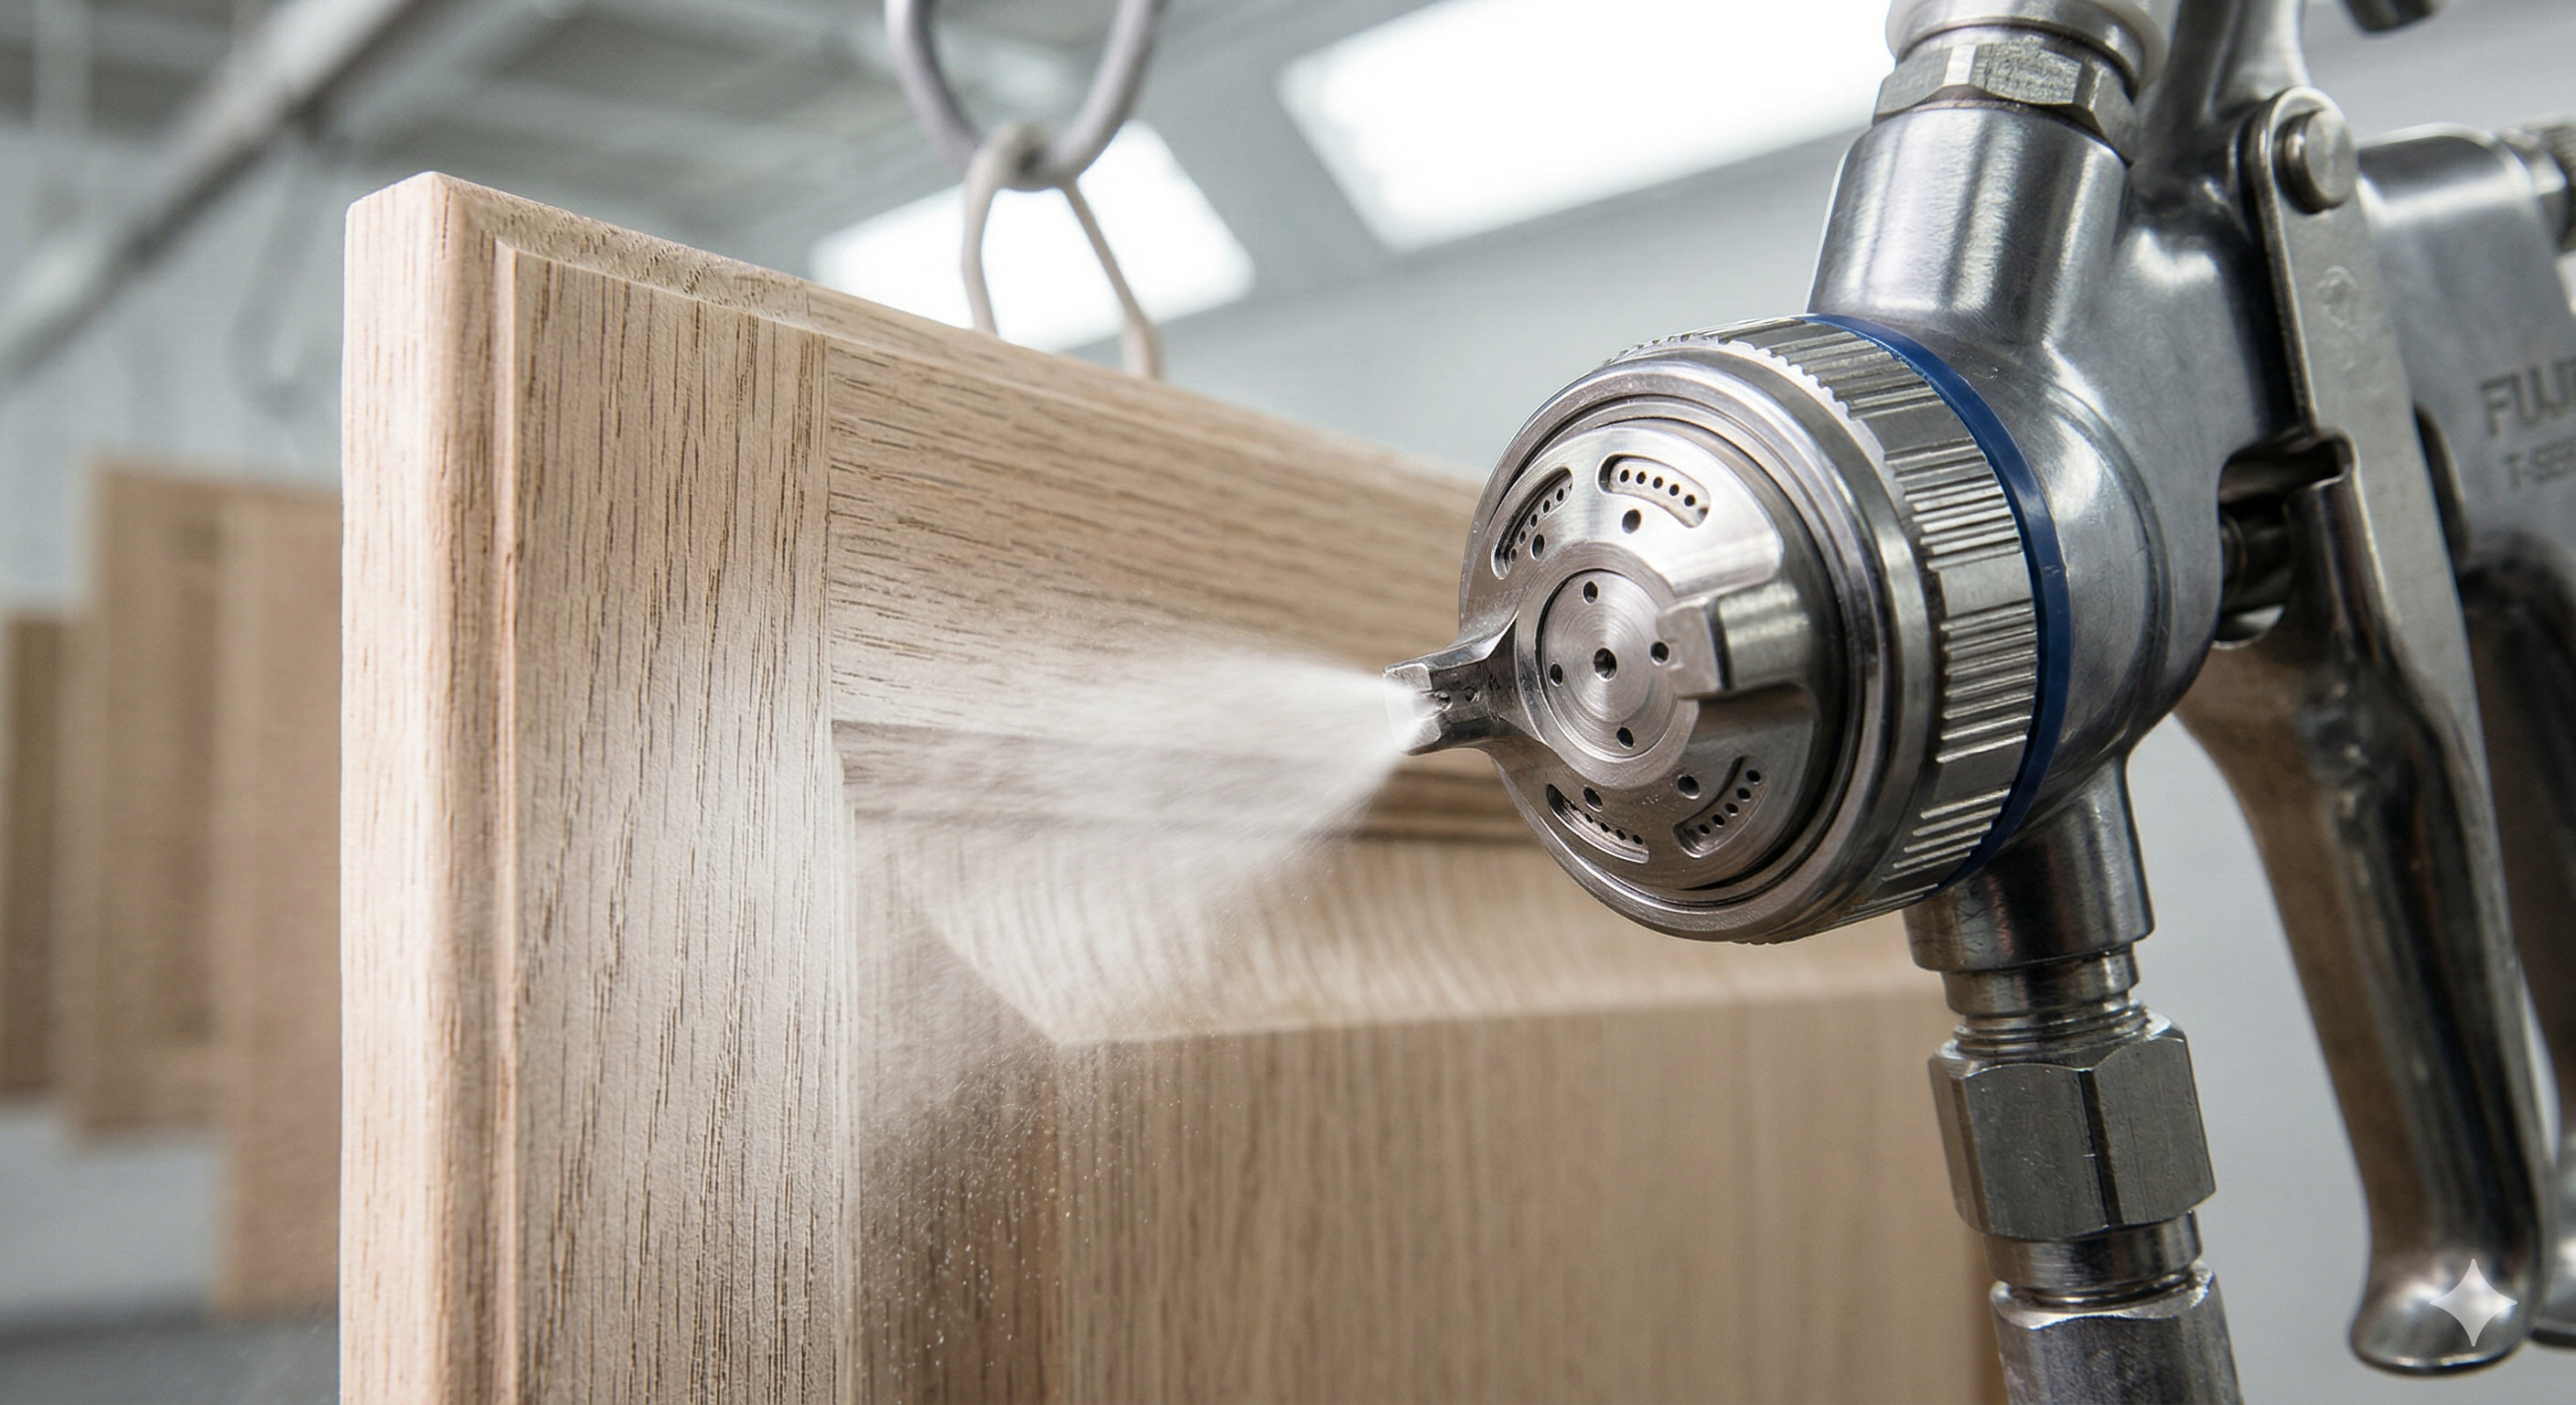
9
2-Coat Professional Spray Topcoat
The finish coat — your selected product (see packages below) — is applied in two precision spray coats at 2 mils each using a fine-finish HVLP spray tip. Fine-finish spray tips produce finer atomization and a smoother surface than standard tips, resulting in significantly less orange peel and a finish that rivals factory-produced cabinetry. Each coat is sanded and inspected before the next is applied.
-
10
Protected Transport & Reinstallation
Once the finish has fully cured, every door and drawer front is individually wrapped in protective film before transport back to your home. Wrapped components eliminate any risk of finish damage during loading, transport, or unloading. On site, every component is reinstalled in its labeled position, hardware is remounted, and the entire result is inspected for alignment, function, and finish quality before we consider the job complete.
One process. Two levels of protection.
Our full 10-step refinishing process is the same for every project. The difference is in the topcoat — and both are professional-grade products far beyond what you'll find at any hardware store.
- Hard urethane finish — exceptional durability for frequently used, frequently cleaned surfaces
- Non-yellowing formula — resists the amber tint that develops in traditional oil-based cabinet coatings over time
- Fewer coats required — superior coverage efficiency without sacrificing film build or hardness
- Interior & exterior rated — applies to kitchen cabinets, doors, and all trim applications
- Available in the full Sherwin-Williams Designer Color Collection
- KCMA-compliant finish — meets or exceeds the Kitchen Cabinet Manufacturers Association durability standard
- Two-component performance in a one-component system — exceptional hardness without a catalyst mixing requirement
- Fast recoat window — ready to sand or recoat in as little as 35–45 minutes for efficient production
- Superior moisture & chemical resistance — engineered for the demands of kitchen environments
- Excellent blocking resistance — doors and drawers won't stick or seal together even in humid Florida conditions
- Self-sealing formula — flows and levels to a glass-smooth finish with a fine-finish spray tip
Ready to transform your kitchen without replacing your cabinets?
Get a free, no-obligation estimate within 24 hours. We'll walk you through the full process, recommend the right coating for your cabinets, and give you an honest picture of what to expect before, during, and after the job.